This is going to be a complete backstory of light painting under a Super Blue blood moon Sky. The entire process of creating this photograph was a collective progressive steps that worked out for us throughout – a complete life saver which we later realized – is what we love to share here.
Categorizing the requirements:
Analyzing natural conditions – the moon-rise & lunar eclipse is totally unpredictable since we planned to have the light painting done with a model under the moonlit sky.
Gears you need – Equipment and gears you need to shoot under these conditions.
Optimal Settings – Figuring out the camera settings for best results.
Making of Tubes:
Since tubes that were used for this light painting was not readily available & we had to go on DIY mode. We purchased acryllic tube that was 2m long & cut it into two with
Inner diameter 44mm
Outer diameter – 50mm
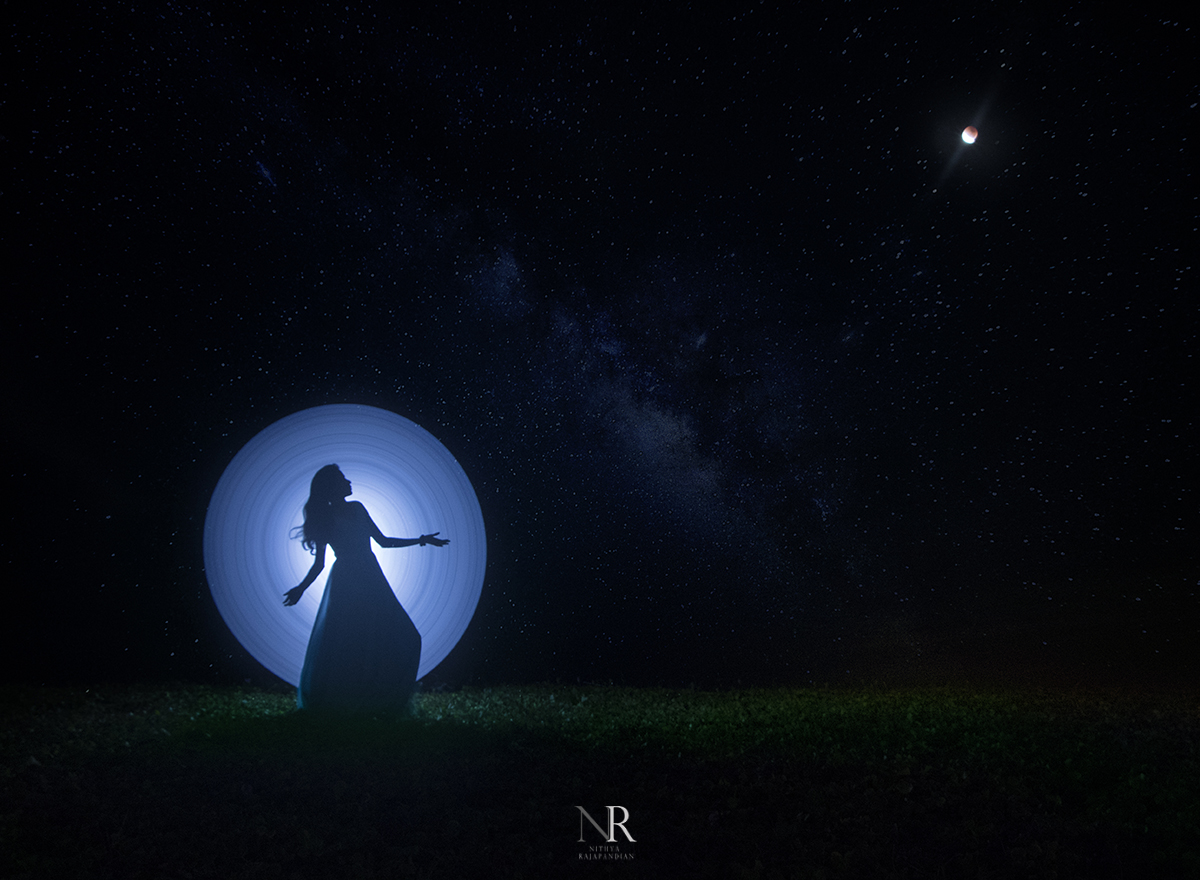
Since we had to achieve light patterns of colors – we had to think of multiple ways to color the tube & finally we painted it white & red. Coming to choice of flashlights any powerful flashlight preferably with strobe mode will help you get creative while capturing is the best choice Take some test shots before the shoot.
Choice of Camera Gear:
As per the choice of your shots that you have planned choose your gears. For our requirement we went for
- Canon EOS 7d mark ii (Body)
- Canon 18-135mm (wide angle shots)
- Canon telephoto 70-200mm (long range & tight shots)
- Sturdy Sony tripod
Ideating, Visualizing & Sketching:
It all started with conceptualization of the shot before hand and plan it accordingly. I have conceptualized few shots of having the super blue blood moon, the model along with light painting patterns in a single frame. Then I started sketching out the various positions of moon & light painting – the patterns that we can create & the poses of model .
Analysing Conditions:
- First locate the moonrise direction in the area that you would want to shoot – we did this using
- Direction and Altitude of moon : www.timeanddate.com/
- Once we had the latitude & longitude of the moon-rise – I used my iPhone’s in built ‘Compass’ app to show me that right location/direction of rise so that I can choose a location that will suit my need.
Get Your Location Right:
After the visualizing & getting to know the direction now the target is to choose a suitable location for shooting.
- A vast isolated place
- Less light polluted area & with less crowd as well.
- With all these factors to consider & given that we are in a coastal area we chose a seascape.
- On the day of shoot, make sure you reach a lot early so that you are ready for unpredictable factors
- Make your outdoors look clean on the photograph
Tip : Always have that plan B – look out for alternate place while location scouting.
Choose Right Part of the Day:
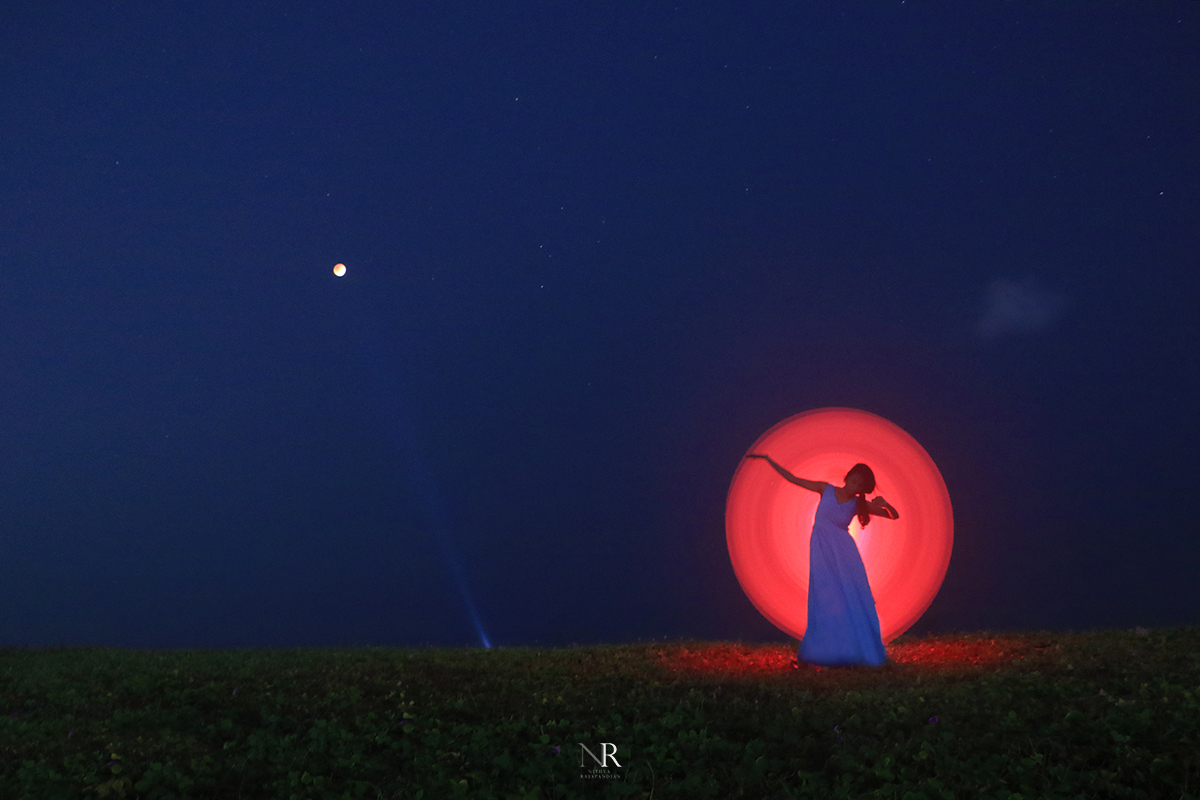
The moon-rise was predicted to happen at around 5.45 to 6.15 pm IST on that day. So for the light painting patterns to be vibrant we needed to have that optimum darkness where the details of the model, landscape, moon & stars to be clearly visible, but with that ‘just-before-darkness’ ambient light. This clearly indicated to shoot at ‘Twilight’ (blue hour window) rather that when it was completely dark which would force to bump up the ISO too much – a not so good factor for the photograph which may result in increased noise.
Optimal Camera Settings for Light painting:
For twilight conditions – since we want the twilight effect we choose a higher ISO. 2500 Frame was exposed up to 4 sec in bulb mode. Optimum settings – 2 to 4 sec F-stop – we nearly wanted all of the details in the frame to be in focus – so it was around f4 to f5.6
For dark night & only light patterns & moon to be visible ISO – 1000 (+ or – 2 stops) will work great.
Tip : Don’t be afraid to bump up the ISO since most of the cameras that are available in the market now can handle noise well.
For Moonrise & eclipse shots:
Full range zoom – 200mm or any other long range lenses using extenders. A slower shutter speed will help you expose the frame for more time & able to capture the details
F-stop – we nearly wanted all of the details in the frame to be in focus – so it was around f4 to f5.6
Tip – A (sturdy) tripod on the day would keep boring photographs away.
Hope you find this article informative. I have also written an article where I have shared 5 important tips for light painting Photography, have a read.