For those who have used Adobe Photoshop extensively will agree with me that over a period of time retouching or editing your photos can seem to become monotonous and the repeated workflow may make the whole show less fun.
This may be due to number of reasons like – the amount of time it takes for a photo to be retouched, repetitive steps, same way of approaching and retouching photos etc.,
So, I – in my very less usage of Adobe Photoshop for a year, tried to learn some shortcuts one by one as and when I am retouching a photo. This, which at first tried to eat my brains to remember the confusing shortcut keys for various tasks – over time and usage, it has significantly reduced the time of retouching a photo with no compromise in the quality of output or at times even a little extra classy output.
Pro Tip:
Do not learn all the shortcut keys at once. You will definitely not remember all or any of them at all since your workflow will involve only a few. This is because every person’s preferences and way of working differ a lot and we will be using only a handful of them. I would suggest that you at first work normally with your photos, try to identify the steps that are consuming your time or the repetitive steps that you may eliminate to quicken your workflow. So now you can try to customize shortcuts or use Photoshop’s default shortcuts and play around.
What I have seen is ‘n’ no. of articles on Adobe Photoshop shortcuts / customizing shortcuts, on the Internet – but what I have not seen is where they categorize the photographs and then tell you what will be the most common shortcuts that you will actually need to know. In a way this saves the reader’s time and give more clarity in otherwise confusing process of learning shortcuts.
Classification of keyboard shortcuts in Adobe Photoshop
I thought I would lay it clear in terms of how we would use the handful of efficient shortcuts from a ocean of it. In this article I am excited to discuss on some of the
- Photoshop’s default shortcuts
- Customizing your own shortcuts
- Categorizing the usage of shortcuts based on the type of photograph that you are retouching.
Adobe Photoshop’s default / Common shortcuts
- Ctrl + J – Duplicating existing layer
- Ctrl + N – New layer
- Ctrl + Shift + N – New layer in a new dialog box (as soon as PS starts up this command does it in less than no time)
- Ctrl + Shift + E – Flatten layer – it will allow you to stack the content of underlying layer and make it into a single layer and sharpen the layer.
- Ctrl + Shift + [ – Bring the selected layer to top of the stack
- Ctrl + Shift + ] – Bring the selected layer to bottom of the stack
- Ctrl + Shift + S – ‘Save As’
- Ctrl + S – Save
- Ctrl + Shift + A – Opens Camera Raw Module
- Ctrl + Alt + I – Image resize dialog box
- Ctrl + Shift + C – Copy multiple layers
- Ctrl + D – Deselect
- Ctrl + shift + D – Re-select the selection that you accidentally clicked away from it
- Alt + Brush tool – sample a color from the image instead of using eyedropper tool
} / { – increase or decrease brush hardness - Ctrl + T – Free transform
- Ctrl + U – Hue/saturation adjustment layer
- Ctrl +B – Color balance adjustment layer
- Ctrl + M – Curves adjustment layer
- Ctrl + U – Desaturate – Convert your color image to grayscale values, leaving the image in the same color mode.
- Ctrl + Shift + R – Lens correction – a quick fix for the image when it suffers lens distortion / aberration
- Ctrl + shift + Alt + A – Adaptive wide angle – straightens the lines that are curved when using wide angle / fish-eye lens or panorama shots when stitched together.
- Ctrl + – zoom in
- Ctrl – – zoom out
- Ctrl + alt + 0 – view actual pixels
- Ctrl + G – group layers
- Ctrl + Alt + z – Undo steps
Customizing your own shortcuts
(trust me, it can be done in 3 steps – less than 5 seconds)
Adobe Photoshop gives you the freedom to overwrite the default shortcuts with the ones that you prefer. So you have full control of customizing your shortcuts.
Edit -> Keyboard shortcuts
The below dialog box opens

Under shortcuts for we have menus like application, panels & tools menu. Choose the appropriate one to find the relevant options that will be displayed below (marked in the below image).
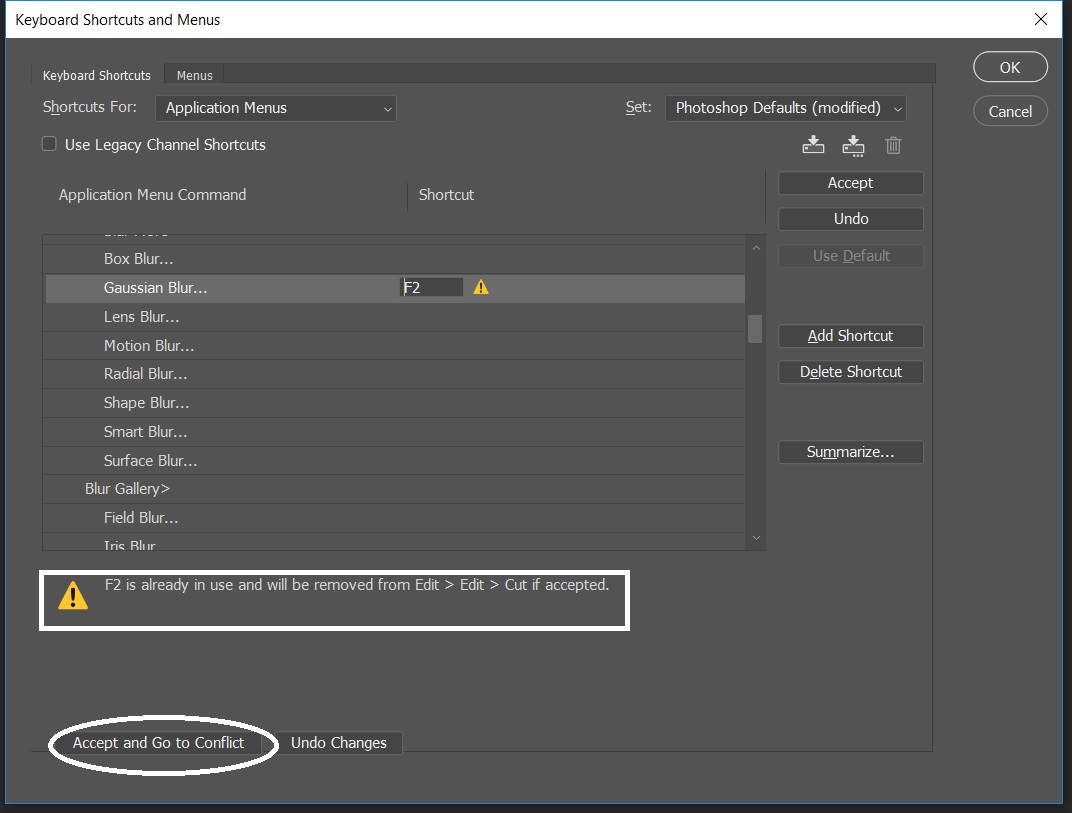
In my case I wanted to create shortcut for Gaussian blur. It’s under the ‘Application’ menu. All I need to do now is to select and type the required shortcut. Photoshop will give prompts if the shortcut you have already typed in is in use but also says that if you are still ok to replace then you can go ahead.You can likewise customize all your workflow in this fashion.
Isn’t it real simple and efficient?
Keyboard shortcuts for editing Landscape Photographs
Retouching landscape photos – the main purpose is to make it look vibrant, colors and structures to be distinct and clear. So my general workflow will mostly be in the Camera RAW module. On the default work-space, I do some dodge and burn, straightening the image, color balance and select particular areas of the landscape and work on the colors, highlights and shadows. Also for social media, I will try to clone out few areas.
so the shortcuts I use mostly (not the only ones) for retouching landscapes will be
- Ctrl + U – Hue/saturation adjustment layer
- Ctrl +B – Color balance adjustment layer
- Ctrl + M – Curves adjustment layer
- Ctrl + J – Duplicating existing layer
And some customized shortcuts (as explained above)
Keyboard shortcuts for editing portraits
When coming to portraits, there are again different approaches to retouching depending on the purpose. For instance, if its for any portfolio – I would love to do high end retouching for skin which would involve frequency separation and working on separate channels which makes it look very natural yet strong. Same workflow for any high end fashion shoot where I want the features real sharp.
So Gaussian blur is the main tool which I will be using countless number of times for a single photo which might go even up-to an hour. I have customized shortcut this (as explained above). Trust me it will save a tonne of time. Apart from this you will be mostly using default shortcuts which you have already seen.
Cheat Sheet approach
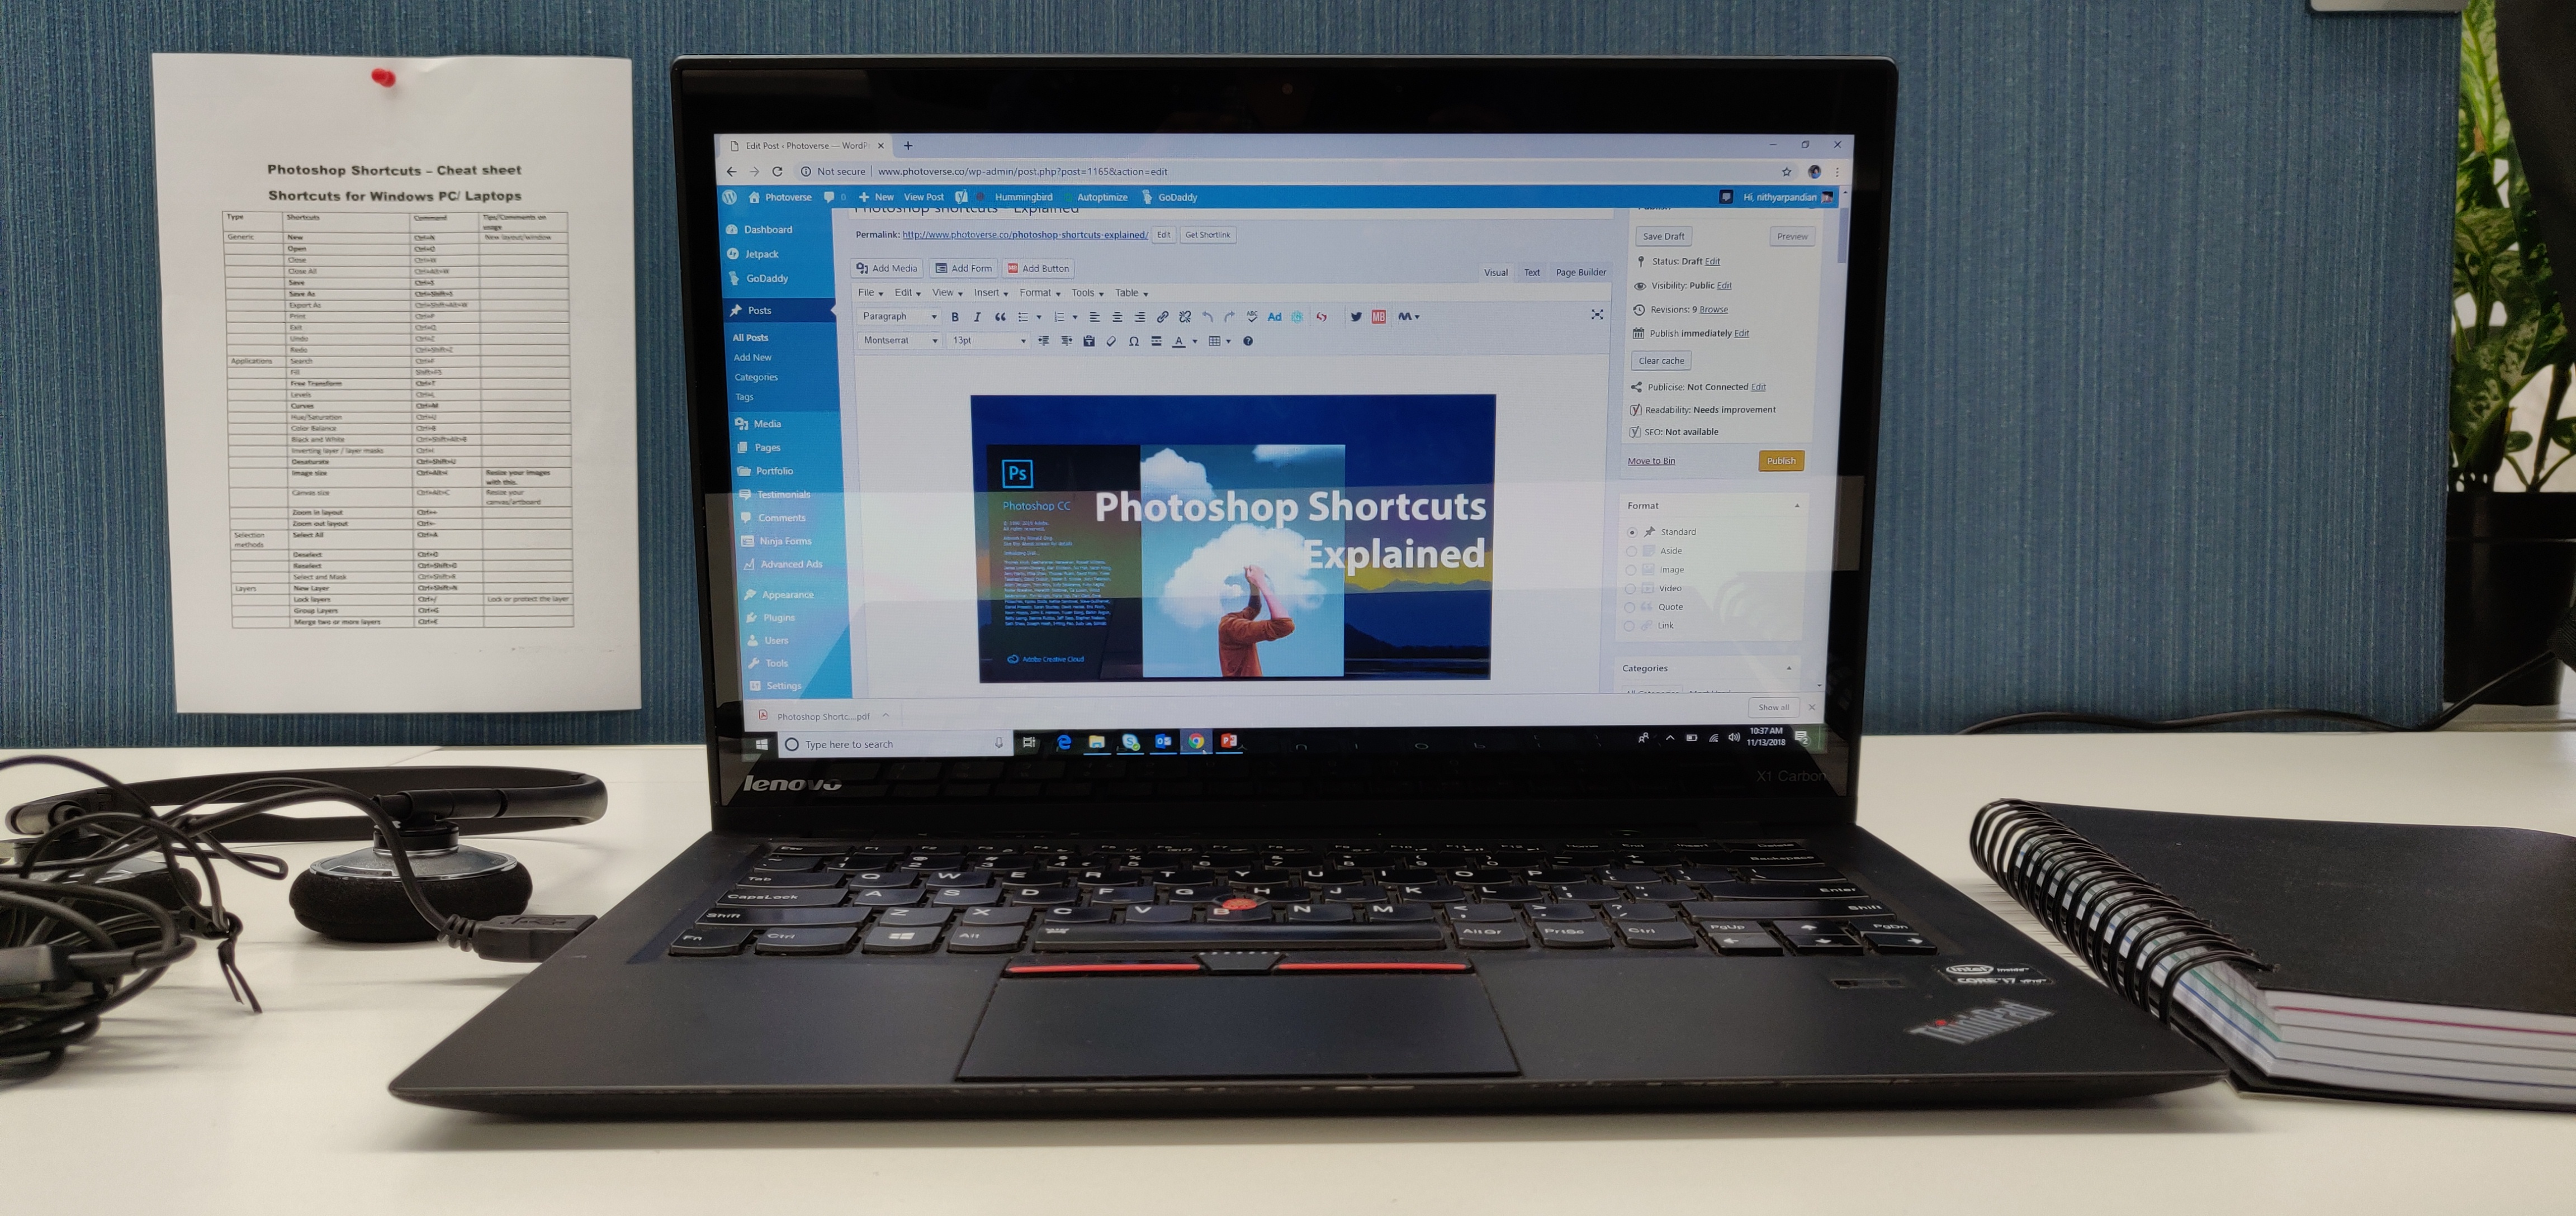
It takes time to memorize the shortcut and bring it into practice. So as a hack I had most used shortcuts printed in the form a cheat sheet and had it pinned in my workstation. So whenever I forgot a specific shortcut, I can always refer to that quickly without having to meddle with all the options or check the shortcut in Photoshop itself.
This cheat sheet approach has increased my editing speed a lot and made it easy to remember the shortcuts. Below in the given link is the cheat sheet I have been using, download it and take a print out of it. Stick it up near your work desk just like I did- I am sure it will turn handy. After a period of time – you are not going to need it)
Download Photoshop Cheat Sheet
Hope you guys found these shortcuts helpful. Would be glad to know your thoughts and any Eureka moment while trying to create these shortcuts.
Catch you soon with another interesting article.